navigate_next Help & Resources navigate_next Printer Info & Setup

Order the printer now, get set up once it arrives.

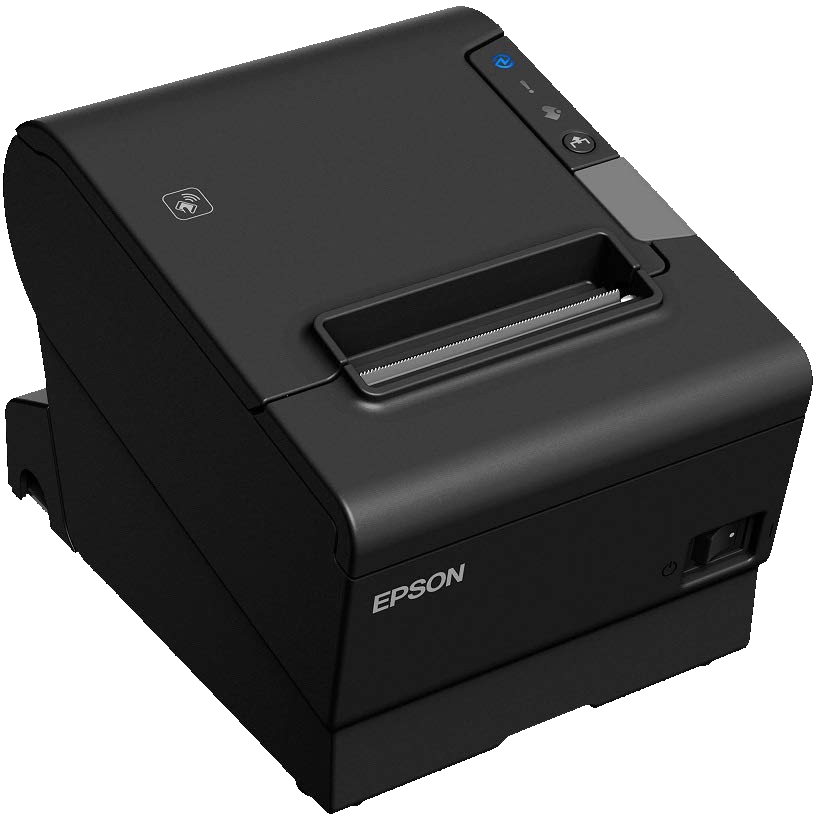
Premium ticket printer: Epson TM-T88VII

  • For WIFI or Ethernet:
    Epson TM-T88VII base model with OT-WL06 USB WIFI module included.
    (Model No. C31CJ57A9922):
  • Search for item on Google
    Usually around $399 USD.

  • For Ethernet only:
    Epson TM-T88VII base model with no USB WIFI module.
    (Model No. C31CJ57052):
  • Search for item on Google
    Usually around $299 USD.
Epson-TM-T88VII

Server Direct Printing

The chatQR.ai system supports Epson printers that have Server Direct Printing available:

  • Printers connect directly to the chatQR.ai system to provide reliable automatic ticket printing.
  • Printers can be positioned anywhere at your location where there is WIFI reception. The printer does not need to be near a tablet due to poor Bluetooth range/reception.
  • No additional tablet or running app is required to guarantee reliable printing of tickets.

Epson TM-T88VII

Any Epson Server Direct Printing Printer is supported, but our recommended printer model for easy setup is:

Any Epson TM-T88VII model will support Server Direct Printing over the built in ethernet port, and can be upgraded to include WIFI by purchasing the OT-WL06 (with AC WIFI) or OT-WL05 (without AC WIFI) USB WIFI module separately.

The Epson TM-T88VII is compatible with most other traditional POS apps and can be used with them at the same time as chatQR.ai.

Setting up your printer

If you would like some assistance or have any questions regarding printer configuration, feel free to email at any time hello@chatqr.ai. This is the trickiest part of the whole chatQR.ai setup!

Before you can configure your printer, the printer must be on your local network. With an ethernet cable, this should be as simple as plugging in the cable into your existing ethernet switch/router LAN port.

For WIFI, the printer will initially broadcast an Ad-Hoc WIFI network that you will need to join on either your laptop or iOS/Android device. Once your device is on the Ad-Hoc network, you will be able to access the configuration panel and provide the printer with the network name and password of your existing local WIFI network.

Once your device is on the same network as the printer, you can configure the printer via two options:

  • The Epson TM Utility app for iOS or Android. The Epson TM Utility will automatically detect the printer on the network. This can be an easier option.
  • The web based admin panel. This is accessible via the IP address that will be automatically printed on a ticket when the printer turned on. The default username and password for the Epson web based admin panel is Username: 'epson', Password: 'epson'.

Once you are in the printer configuration, the WIFI details can be configured to join your local network.

Configuring chatQR.ai with Server Direct Printing

To configure a printer, create a printer on the chatQR.ai "Manage Printers" screen. Once the printer is created, the system will start storing print jobs to be printed once the printer is configured to fetch them.

Add the URL provided on the "Manage Printers" screen to your Epson Server Direct Printing configuration via the web based admin panel or via the Epson TM Utility app. Server direct print settings can be found in the 'EpsonNet Config for TM-i' section.

Once this URL is added, the printer will automatically fetch print jobs directly from the chatQR.ai server.

And you're done! The printer will now reliably print forever. If the internet connection goes down, printing will automatically resume as soon as the internet is restored.

Star CloudPRNT

chatQR.ai has not yet added support for Star CloudPRNT enabled Star printers. Contact us at hello@chatqr.ai if you want to connect a Star CloudPRNT enabled Star printer.
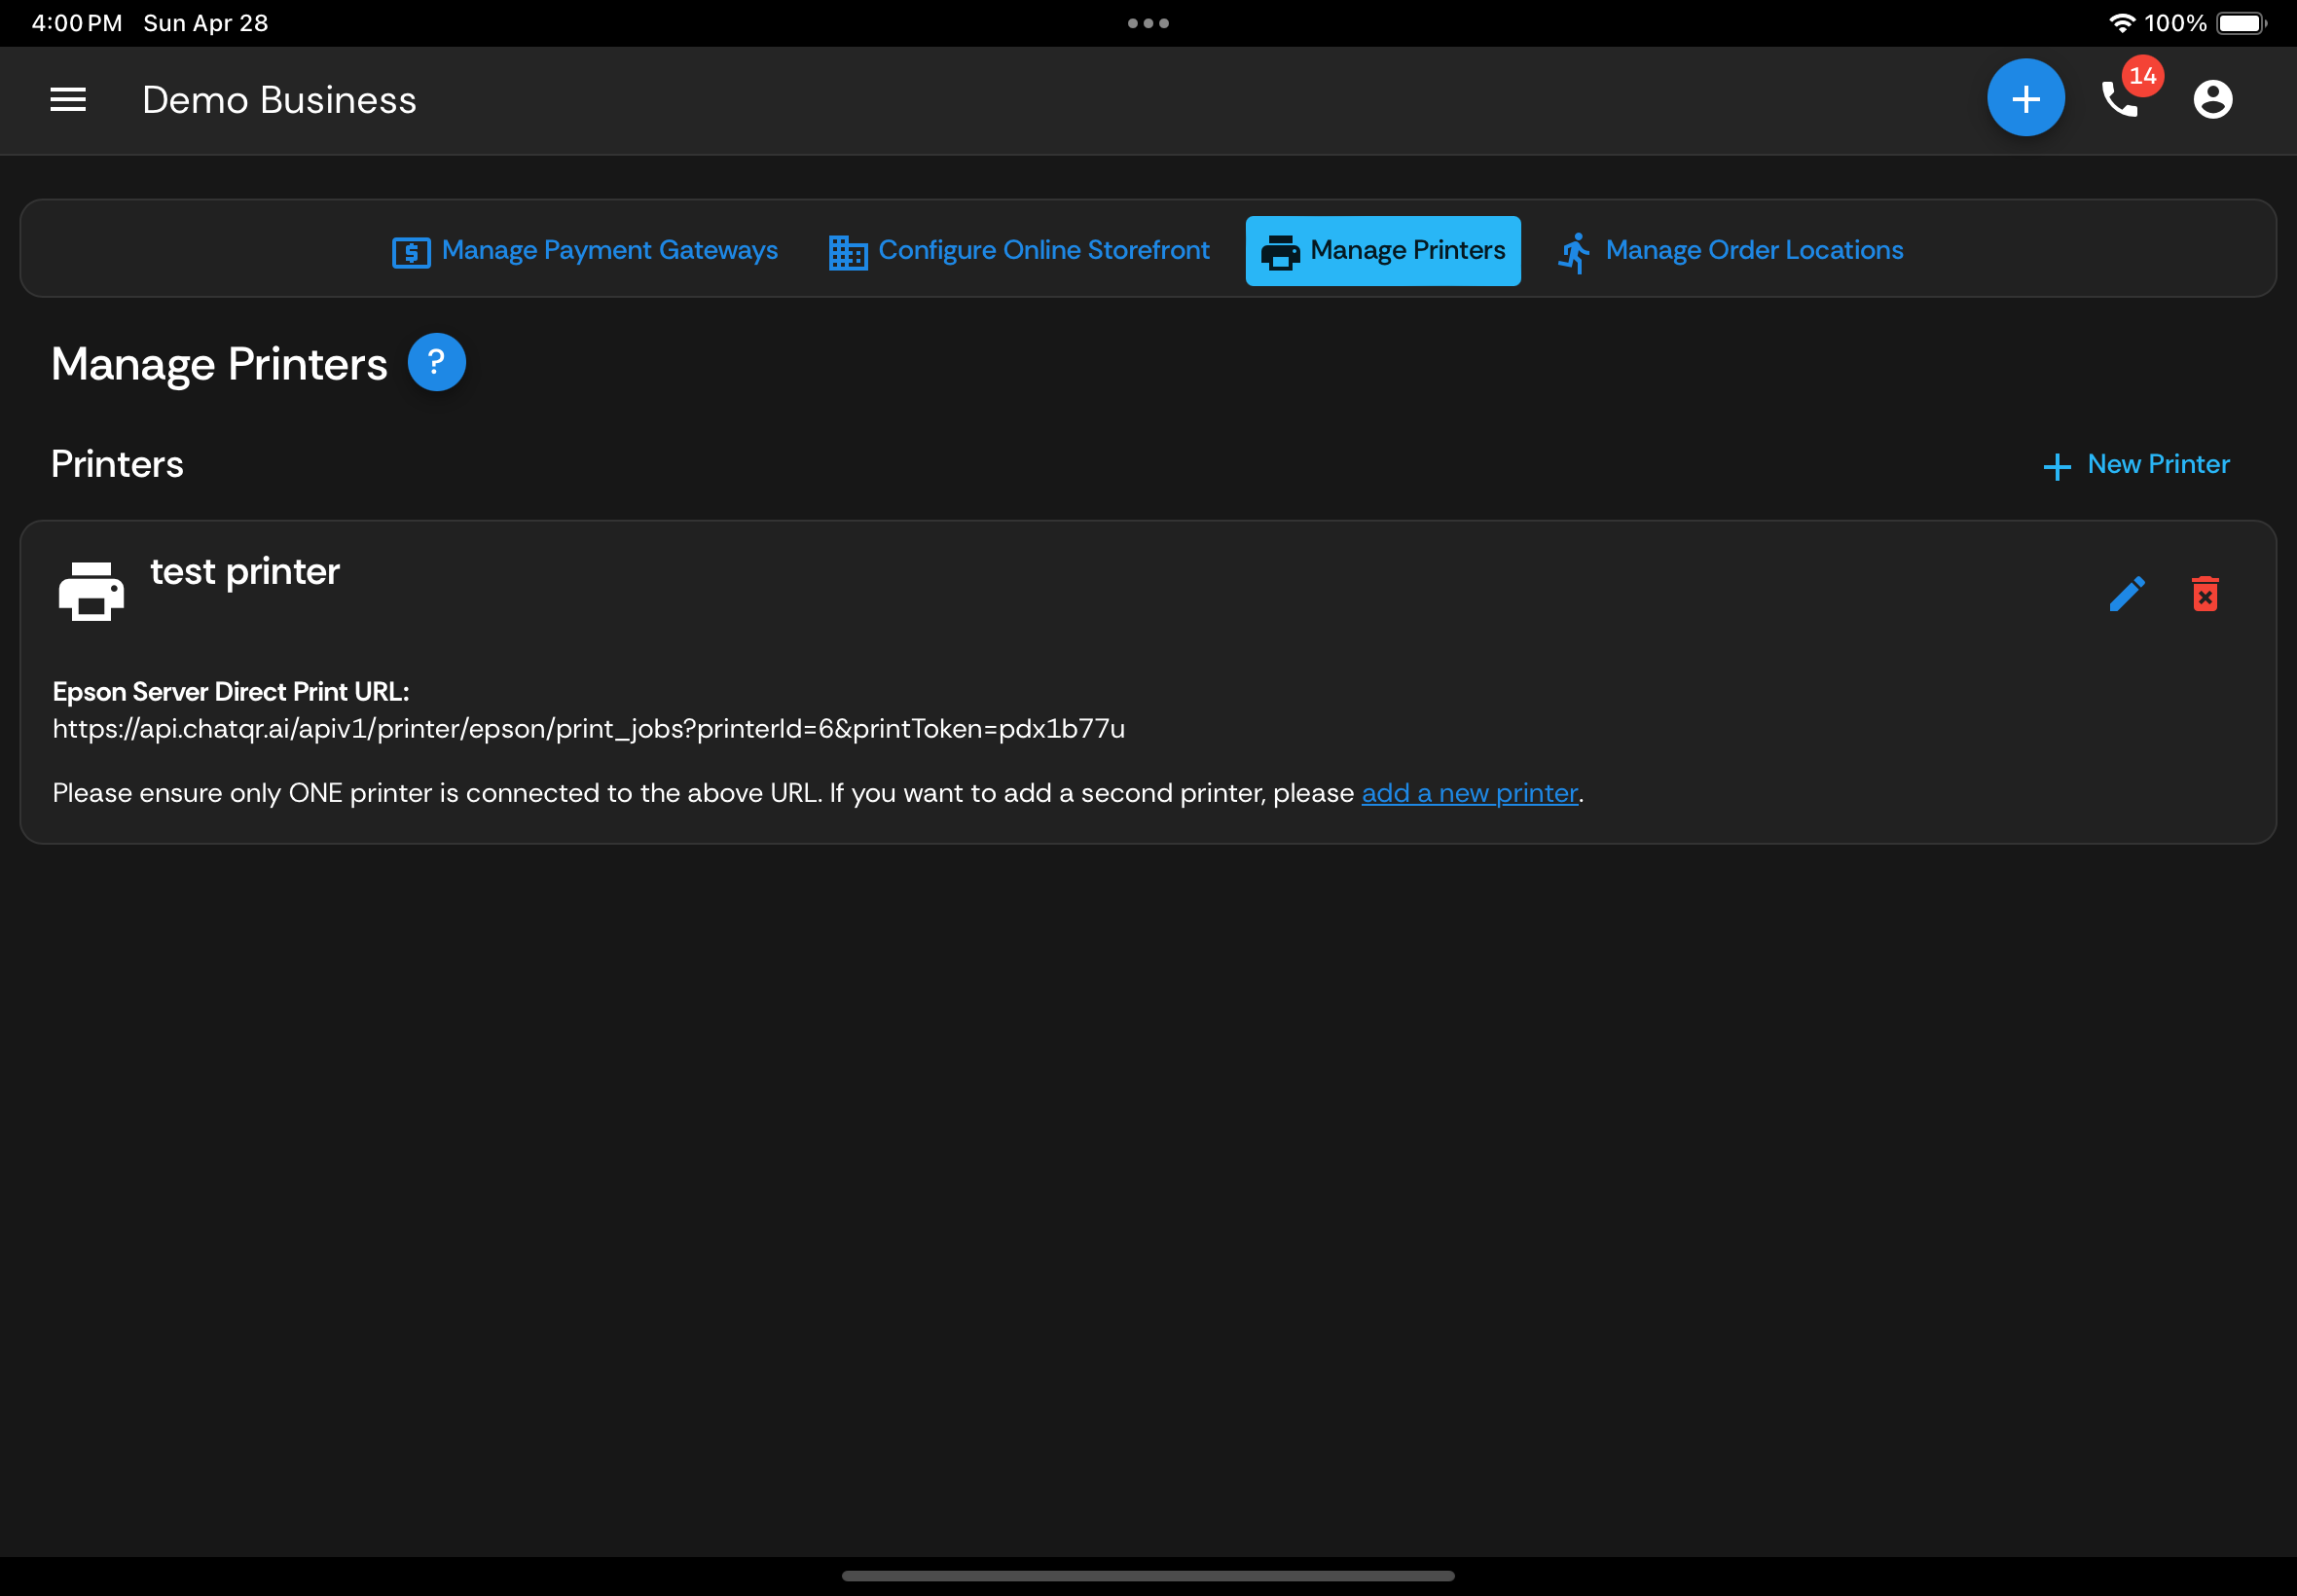
Manage printers